Hives & Equipment
How to Paint and Weatherproof Your Wooden Beehive Boxes
Learn how to paint a beehive the right way: choosing exterior paint or stain, prepping raw pine, timing it around bee installation, and touch-up schedules.
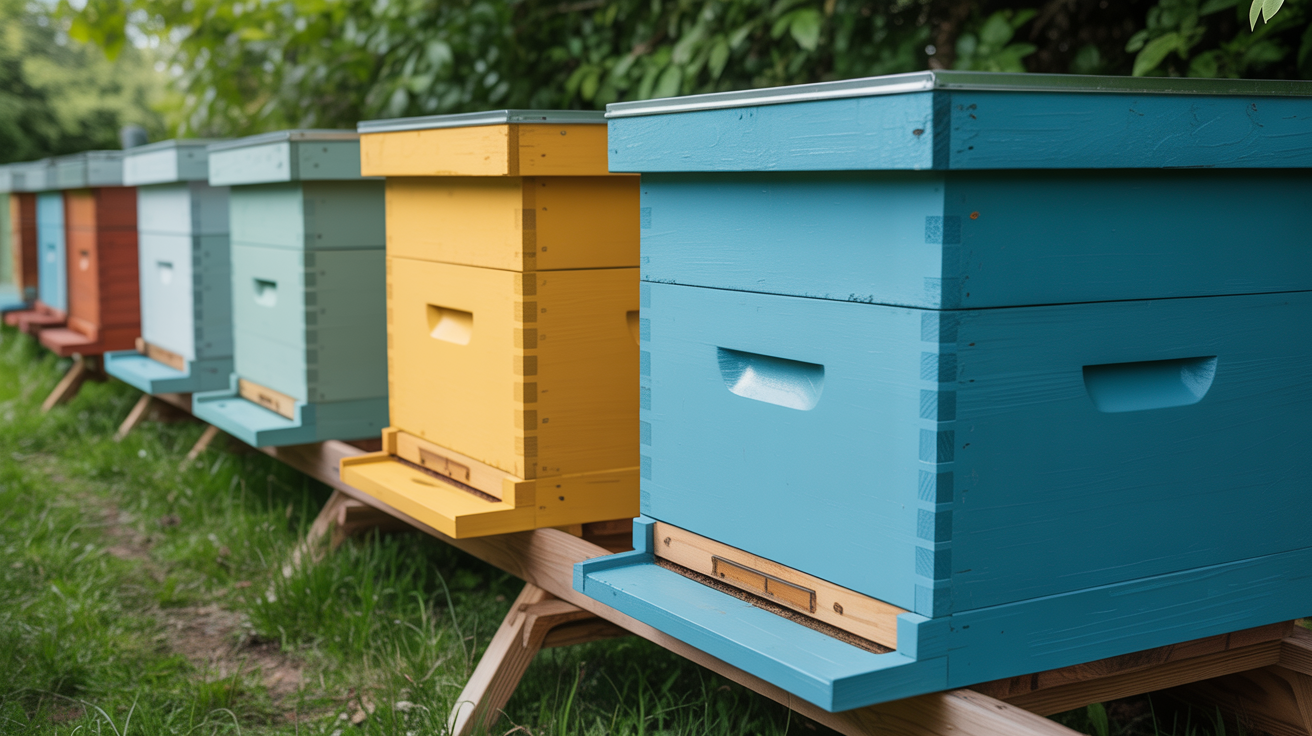
A stack of raw pine boxes looks fine in your garage, but leave them outside through one wet spring and you'll see why weatherproofing matters. Figuring out how to paint a beehive properly, before bees ever move in, is an unglamorous job that determines whether your equipment lasts eight years or three. It's not complicated, but a few details separate a hive that sheds water for a decade from one that's soft and swollen by its second winter.
Why Only the Outside Gets Painted
New beekeepers often ask if they should coat the interior too, maybe to make it easier to clean or to add another layer of protection. Don't. Bees seal the inside of the box themselves with propolis, the sticky resin they gather from tree buds and use to caulk every gap, seam, and rough patch inside the hive. It's antimicrobial, it's flexible, and it's exactly the coating the colony wants in there. Painting the interior adds nothing useful and risks trapping solvent smell against the wood right where the bees live and raise brood.
There's also a practical reason to leave the inside bare: raw wood gives bees something to grip and propolize easily, and a painted interior surface interferes with how propolis bonds to the grain. So the entire weatherproofing job is an exterior job, covering the outer walls, the outer face of the bottom board, and the exterior of the lid. The inside stays raw pine.
Picking Your Finish: Paint vs. Stain
The two mainstream options are exterior-grade latex paint and oil-based (or water-based) exterior stain, and both have a fair number of longtime beekeepers behind them.
Exterior latex paint is the more common choice. It forms a continuous film over the wood, blocking water more completely than stain does, and comes in any color your local hardware store can mix. It holds up well, it's easy to touch up by feathering new paint into old, and it forgives minor application mistakes.
Oil-based or semi-transparent stain soaks into the wood fibers instead of sitting on top. It won't peel after years of sun exposure since there's no film to crack, but it offers less of a moisture barrier, so you'll likely reapply more often. Some beekeepers prefer stain because it lets the grain show and a worn stain job looks weathered rather than shabby.
Latex paint is the safer bet for beginners because it's more forgiving and more available, but stain is a legitimate choice if you like the look and don't mind the extra maintenance.
Color Matters More Than People Expect
Hive color affects the internal temperature of the box, and that has real consequences for how hard the colony has to work to regulate its own climate.
- Lighter colors (white, cream, pale gray) reflect more sunlight and keep the box cooler. In hot summer climates, especially the Southeast and Southwest, lighter hives reduce how much the bees have to fan and evaporate water just to keep the brood nest at a stable temperature.
- Darker colors (deep green, barn red, navy) absorb more heat. In cooler, shorter-summer climates, a darker hive can help the colony warm up faster on cold spring mornings, which matters for early brood rearing and foraging activity.
If you're somewhere with genuinely hot summers, lean light. If your season is short and springs are cold, a darker color isn't a bad call. Plenty of hobbyists split the difference with medium tones, so don't agonize over the exact shade. Get the wood covered; color is the secondary lever.
Prepping Raw Pine Before You Touch a Brush
Skipping prep is the most common reason a paint job fails early. New hive boxes usually come from the supplier with mill marks, rough grain, and sometimes a bit of sap residue, none of which paint bonds to well on its own.
- Sand lightly. You're not trying to make the wood glass-smooth, just knock down rough grain and splinters, especially around the hand holds and finger joints. 120 to 150 grit is plenty.
- Wipe off dust. A dry cloth or a quick blast of compressed air clears sanding dust that would otherwise sit under your primer and weaken adhesion.
- Prime it. An exterior wood primer rated for knots and raw pine seals the wood and gives the topcoat something consistent to grip. This step determines whether the finish lasts five years or two.
- Apply two coats. One coat almost always shows thin spots once dry. Two coats, allowed to dry fully between applications, give a more even, durable surface.
If you bought a full beginner setup rather than building boxes yourself, check what finish it already has. Some ready-made kits, like the gear covered in the beekeeping starter kit worth buying first, ship pre-primed or even pre-painted, in which case you may only need a topcoat rather than a full prep cycle.
Timing It Right: Paint, Off-Gas, Then Move In Bees
Paint and primer both release solvent fumes as they cure, and that smell needs to fully dissipate before bees go anywhere near the box. This isn't about toxicity to the finished, cured paint film. It's about the off-gassing period right after application, when solvents are still evaporating out of the coating.
Plan on painting your boxes at least a week or two before installing a package or a nuc, and store them somewhere with airflow, not a sealed shed, while they cure. By the time you smell little or nothing standing close to the box, it's ready. Latex paint generally off-gasses faster than oil-based stain, so build in extra time if you've gone the stain route.
This is also a good moment to double check your hive stand is ready, since a freshly painted box left sitting directly on wet ground will pick up moisture from below no matter how well the exterior is sealed. If you haven't sorted that out yet, how to set up a hive stand that stays level covers what keeps a hive dry and stable long term.
Which Joints and Edges Take the Worst of It
Water doesn't attack a flat panel first. It gets into a hive box through joints, edges, and end grain, and that's where a weatherproofing job needs the most attention.
- Finger joints and box corners. These interlocking joints expose more end grain than a flat wall, and end grain soaks up water far faster than face grain. Work paint into the joint lines, not just over the top.
- The bottom edge of each box. This edge takes the worst splash-back from rain and morning dew and is often the first place beekeepers see paint failure.
- Handle cutouts. The routed hand holds expose raw wood on the inside curve, and constant handling wears finish down faster than sun or rain alone.
- The outer cover's underside and the inner cover's top rim. These horizontal surfaces catch standing water rather than shedding it, so they need a solid coat and, ideally, a slight bevel.
A few extra minutes with the brush on these spots pays off over years rather than seasons.
How Often to Touch Up
There's no fixed rule, since sun exposure, rainfall, and paint quality all vary from yard to yard, but a rough pattern holds for most hobbyists. A quality exterior latex paint job on a well-prepped box typically looks tired somewhere in the five to eight year range, showing chalking, fading, or small cracks near joints. Stain tends to need attention sooner, often every two to four years, since it doesn't form the same protective film.
Check your boxes at the start of each season rather than waiting for obvious peeling. A quick spot coat on a small crack or bare patch is far less work than stripping and repainting a box left to weather for years. If you're still deciding what box sizes to build or buy in the first place, it's worth reading deeps vs. mediums, picking your hive box sizes before you invest in paint and prep time for equipment you might want to standardize later.
Frequently Asked Questions
Do I need to paint the bottom board and inner cover too?
Paint the exterior surfaces of both. The bottom board's underside and outer edges take weather just like a box wall, and the outer face of the inner cover benefits from the same protection, though its underside, like the inside of every box, should stay bare.
Can I use leftover house paint instead of buying something specific to hives?
Any quality exterior-grade latex paint works fine, since bees don't need a specialty "beehive paint." The requirement is that it's rated for outdoor use and fully cured before bees go in, not that it's marketed for beekeeping.
Will painting affect how bees find their hive entrance?
Distinct colors and simple patterns on the front of a hive can help bees orient home and reduce drift between neighboring colonies in a crowded bee yard. It's a nice bonus, not a requirement, and plain single-color hives work fine too.
What if I already installed bees in an unpainted box?
You can still paint it. Pick a mild day, work around the active colony carefully, and paint only the exterior while avoiding the entrance area. Let it cure fully before closing everything back up.
Is it a problem if paint gets into the entrance or ventilation gaps?
Try to keep paint out of the entrance opening and any ventilation notches, since dried paint there can narrow the opening or trap moisture in a spot bees pass through constantly. A little masking tape before you paint takes care of it.