Hives & Equipment
Frames and Foundation Explained: Wax, Plastic, and Foundationless
Learn the differences between wax, plastic, and foundationless hive frames so you can choose the right setup for your backyard colony.
Beehive frames hold the comb your bees build on, and the foundation (or lack of one) shapes how they build it. The choice affects your inspection routine, your equipment costs, and how willing your bees are to draw comb in the first place.
What Frames Actually Do
A frame is the removable wooden or plastic rectangle that hangs inside a hive box. Bees build comb on it, raising brood in the center and storing honey and pollen toward the edges. Because frames hang on two protruding end-bars (the ears), you can lift each one out, flip it, and read the comb without breaking anything.
That removability is the core of modern beekeeping. It allows you to check for disease, split a colony, or confirm a queen is laying, tasks that were nearly impossible before Lorenzo Langstroth patented the movable-frame hive in 1852.
Frames come in three depths to match your box: deep (9-1/8"), medium (6-1/4"), and shallow (5-3/8"). Most beginners start with all-deep brood boxes and either deep or medium honey supers. The guide on deeps vs mediums walks through that tradeoff.
Foundation: What It Is and Why It Matters
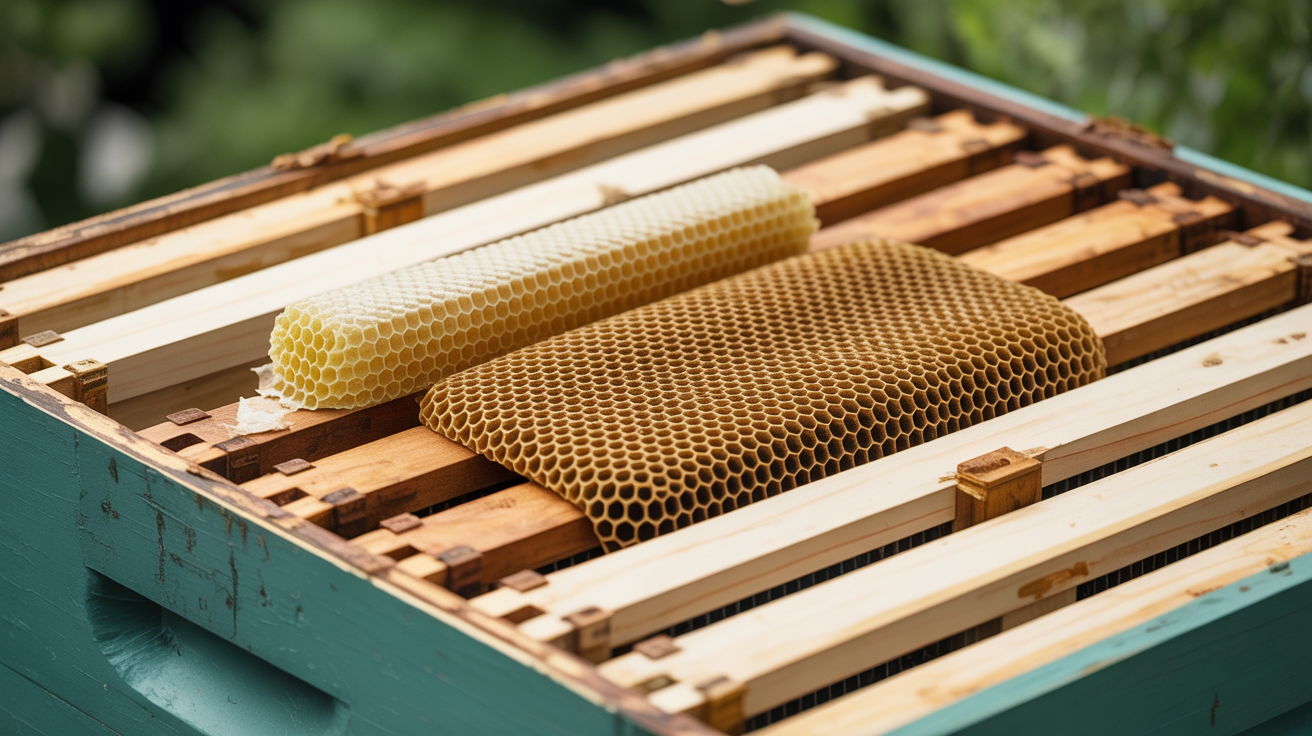
Foundation is a flat sheet of material installed inside the frame. It gives bees a pre-textured surface to build comb from. Without any guidance, bees in a new empty frame will sometimes draw comb at a crooked angle, cross-comb between adjacent frames, or fill odd gaps rather than building in the orderly rows you need for easy inspection.
Most foundation carries an embossed hexagon pattern matched to worker-cell size (roughly 5.4 mm across). Bees use that pattern as a guide and draw the cells straight, aligned with the frame, and removable with the frame. Some foundation adds wires for rigidity; others snap into a rigid plastic base that needs no wires at all.
The three main options are pure beeswax sheets, plastic-core foundation, and going foundationless entirely. Each has real advantages and real drawbacks.
Wax Foundation
Pure beeswax sheets are the traditional choice. They are made by pressing melted wax between roller dies that stamp in the cell pattern. Most sheets also have a thin criss-cross of support wires embedded horizontally to stop the sheet from sagging in warm weather.
Why beekeepers like it: Bees accept wax foundation quickly. There is no unfamiliar plastic smell, and bees can eat through it or reshape it as needed. Drawn wax comb is also softer and easier to uncap when you extract honey.
The downsides: Wax is fragile until drawn. A new sheet can buckle in heat, bow if you drop the frame, or crack in cold storage. Frames with fresh foundation need to be stored carefully and used promptly once the wax is installed. Wax foundation also requires a bit of setup work, either embedding wires or using a frame with a groove-and-wedge design to seat the sheet.
Installing wax foundation: Most beginner frames use a groove-and-wedge design. The top bar has a groove cut into its underside; you slide the top of the sheet into the groove, then nail or glue the wedge strip back in place to clamp it. Side wires (three to five horizontal runs) thread through eyelets in the side bars and crimp tight to keep the sheet from buckling.
Plastic Foundation
Plastic foundation is a rigid sheet of polystyrene or similar material, embossed with the same cell pattern. Most come pre-coated in a thin layer of beeswax to help bees accept the surface. Some versions snap into a plastic frame as a single integrated unit.
Why beekeepers like it: Plastic foundation is nearly indestructible. You can drop a frame, leave it in a hot truck, or store a stack for two years without damage. It needs no wiring. Small hive beetles and wax moths cannot destroy it the way they can drawn natural comb. If the foundation gets chewed down to bare plastic, you brush on fresh wax and the bees often draw it again.
The downsides: Bees sometimes resist drawing fresh plastic, especially if the factory wax coating is thin or has oxidized. The fix is usually rubbing a candle or block of pure beeswax across the surface until a visible white coating appears before you put it in the hive. Colonies in a good nectar flow rarely refuse even bare plastic, but a new package on a quiet early spring can ignore uncoated frames for weeks.
Some beekeepers also find that plastic combs draw slightly larger cells over time, which can matter if you are trying to work with natural-sized drone and worker comb.
Foundationless Frames
Going foundationless means putting frames in the hive with no sheet inside at all, just a thin starter strip along the top bar to give the bees a straight starting edge. Bees then build completely natural comb, sizing their own cells based on what the colony needs at that moment.
Beekeepers choose this approach for several reasons. Natural comb contains no synthetic material. Bees build a mix of worker, drone, and honey-storage cells where they want them, in proportions that may match their biology better than a uniform foundation sheet. Some hobbyists report that colonies on foundationless frames build more drone comb, which can support colony health and reduce varroa mite pressure slightly (varroa prefer drone cells, and culling capped drone comb is a recognized management tool).
The challenge: Without any guide beyond the starter strip, bees can draw comb in unexpected directions. The strip keeps the comb aligned at the top, but sheets can sometimes curve, fan out, or attach to neighboring frames. Checking alignment in the first few days after installing foundationless frames is important. Pulling a frame with attached comb without tearing anything requires patience and experience.
Foundationless beekeeping suits beekeepers who inspect frequently and are comfortable managing comb. It is a steeper learning curve for a new beekeeper who is still figuring out where the queen is.
How to Assemble Hive Frames
Most wooden frames arrive as flat-pack kits: top bar, bottom bar, and two side bars. Assembly takes about two minutes per frame once you have the pattern down.
- Lay the top bar flat with the groove side facing up.
- Push the bottom bar ends into the notches at the bottom of each side bar.
- Tap the side bars onto the ends of the top bar. The whole assembly should be square, not a parallelogram.
- Nail through the pre-drilled holes, or use wood glue and let it cure before nailing.
- For wax foundation: seat the sheet in the top-bar groove, replace the wedge strip, and nail it. Thread and tension the support wires through the side-bar eyelets.
- For plastic foundation: snap or slide it into the frame. Some designs clip in from below; others press into a channel. Add a fresh coat of beeswax if the factory coating looks thin or dull.
- For foundationless: attach a thin strip of wax, a tongue depressor, or the wedge strip itself as a starter strip along the top bar groove. That narrow edge is the only guide the bees get.
Square up a batch of frames all at once and let any glue cure before adding foundation. A slightly racked frame causes real problems when you try to slide a heavy honey frame back into a tight box mid-inspection.
Comparing Your Options
| Option | Durability | Bee Acceptance | Setup Work | Cost Per Frame |
|---|---|---|---|---|
| Wax foundation | Low | High | Medium | Low to moderate |
| Plastic foundation | High | Medium (coat with wax first) | Low | Moderate |
| Integrated plastic frame + foundation | Very high | Medium | Very low | Higher up front |
| Foundationless | Medium (drawn comb) | High | Low | Lowest |
Frequently Asked Questions
Can I mix wax and plastic foundation in the same hive? Yes. Many beekeepers run plastic foundation in honey supers (where durability matters during extraction) and wax in brood boxes (where bees cycle comb more often). Bees don't care which is in which box as long as the surface is wax-scented and the cell pattern is consistent.
My bees won't draw the plastic foundation. What should I do? Rub a block of pure beeswax firmly over both faces of the foundation until you see a solid white coating. Put those frames in the center of the brood nest where the cluster is most active. During a honey flow, bees draw comb aggressively. During a dearth, they sometimes ignore anything new regardless of material, so timing matters.
How often do I need to replace foundation? Old drawn comb gets darker over time as generations of cocoons accumulate inside the cells, and cell diameter shrinks slightly with each cycle. Many beekeepers rotate out the oldest, darkest brood frames every three to five years by moving them to the outside of the box and then removing them entirely once the bees stop using them. Honey-comb frames last much longer since no brood is ever raised in them.
Do I need foundation if I'm running a top-bar or Warre hive? No. Top-bar hives are designed for foundationless comb from the start, with a narrow top bar as the only guide. The guide to Langstroth, top-bar, and Warre hives explains how each hive style handles comb management differently and what that means for day-to-day inspections.
What is the best foundation choice for a first-year beekeeper? Wax foundation in assembled wooden frames is the most reliable starting point. Bees draw it readily, it is inexpensive, and the handling experience matches most instructional beekeeping books and courses. After a full season of inspections you will have a much clearer sense of whether plastic durability or foundationless flexibility is worth exploring. The beekeeping starter kit guide covers everything else you will need alongside your frames and foundation to get a colony established.