Honey & Harvest
Rendering Beeswax: Cleaning and Using Comb
Learn how to render beeswax at home using a solar melter or double boiler, filter it clean, and put it to work in a dozen practical projects.
Rendering beeswax is straightforward: you melt broken or old comb, strain out the debris, let the wax solidify, and end up with clean blocks ready to use. The steps below cover both a no-power solar method and a stovetop double boiler approach, along with what to do with the wax once it's clean.
What Beeswax Is and Where It Comes From
Beeswax is secreted from eight glands on the underside of a worker bee's abdomen. Young workers between 12 and 18 days old produce it at peak rate. They consume roughly six to eight pounds of honey to synthesize one pound of wax, which helps explain why good comb management matters as much as honey yield.
The wax you'll collect for rendering comes from several places:
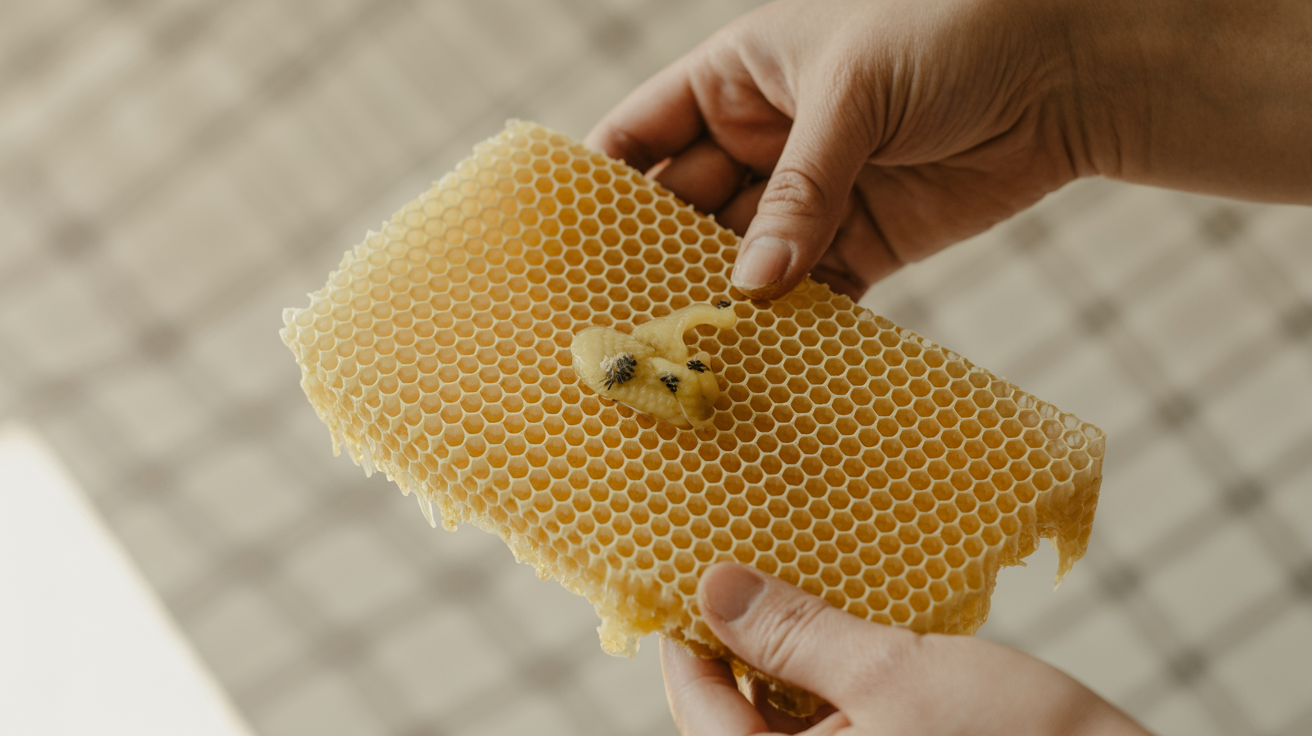
- Cappings from extraction. When you extract honey at home, you slice or scrape the wax cappings off capped frames before spinning. Cappings wax is the lightest, cleanest wax in the hive.
- Old dark comb. Frames that have been through many brood cycles accumulate propolis, cocoons, and debris. Once they're no longer worth keeping in the hive, rendering recovers the wax.
- Burr comb and brace comb. The scraps you remove during inspections add up over a season.
- Broken or moth-damaged frames. If small hive beetles or wax moths damage comb beyond use, render what's left.
Cappings yield pale yellow to near-white wax. Old brood comb yields brown to near-black wax with a much lower clean-wax recovery rate, sometimes as low as 30 to 40 percent by weight.
What to Save and What to Skip
Not all comb is worth melting. A few guidelines:
Worth rendering:
- Fresh cappings from honey extraction
- Comb built in the past one to two seasons with no sign of disease
- Burr and brace comb scraped during routine inspections
Leave it out:
- Comb from colonies confirmed or suspected to have American foulbrood. AFB spores survive heat and can contaminate your wax and your equipment for years. Burn frames from AFB colonies; do not render them.
- Heavily fermented or moldy comb that smells off. The wax itself may be fine, but the cleaning effort rarely pays off.
Store raw comb in a sealed bucket or bag in a cool, dark place until you're ready to process it. A chest freezer works well for longer-term storage and kills any wax moth eggs already present.
Two Methods for Melting Beeswax
Solar Melter
A solar melter is the simplest option: a wooden or cardboard box with a glass or polycarbonate lid, angled toward the sun, with a metal tray or pan inside to collect the melted wax. Temperatures inside a well-built solar melter can reach 150 to 160 degrees Fahrenheit on a clear summer day, well above the melting point of beeswax (around 145 degrees Fahrenheit).
To use one:
- Layer raw comb on a screen or coarse cloth stretched across the pan.
- Angle the box toward midday sun and close the lid.
- Check every few hours; molten wax collects in the pan below the screen as debris stays behind.
- Pour the liquid wax through a fine-mesh filter into molds or a clean container.
Solar melters work best for cappings wax and fairly clean comb. They struggle with dark, debris-heavy comb because the residue can insulate the remaining comb from the heat. On cloudy days or in cool weather, output slows significantly.
Double Boiler on the Stovetop
A double boiler gives you more control and handles dirtier comb well. The key point is that beeswax is flammable at higher temperatures; direct heat on a burner can ignite it. A double boiler keeps the wax below the boiling point of water, which is a safe working temperature.
What you need:
- An outer pot (dedicated to wax work, not food)
- An inner pot or heat-safe container
- A coarse filter: an old pillowcase, cheesecloth doubled over, or a paint strainer bag
- A candy or cooking thermometer
Steps:
- Fill the outer pot partway with water and bring it to a low boil.
- Put raw comb in the inner pot, set it in the water bath, and let the wax melt slowly.
- When fully melted, pour the liquid wax through your coarse filter into a second clean container. Wear gloves; the wax and container will be hot.
- Let it settle for 10 to 15 minutes, then pour again through a finer filter (a nylon stocking works) into molds.
- Let molds cool undisturbed at room temperature. Drafts and cold surfaces cause cracking.
Plan to dedicate your double boiler equipment to wax forever. Beeswax is stubborn to remove from pots, and residue on food cookware is not ideal.
Cleaning Beeswax: Filtering and Settling
One pass through a coarse filter removes the bulk of the debris: comb fragments, dead bees, and propolis chunks. A second pass through finer mesh handles the rest. For very clean wax, a third step helps.
The water-washing method: After the first melt, re-melt the filtered wax in a pot of water. Wax floats; water-soluble impurities and fine debris sink or dissolve. Let the mix cool overnight. The wax solidifies on top as a disk you can lift off. The bottom of the disk often has a layer of "slum gum" (the dark, waxy residue). Scrape that off with a knife before your final melt.
Repeat the water wash if the wax still looks murky. Cappings wax usually needs only one wash. Old brood comb may need two or three.
Color expectations: Even clean, well-rendered wax from old brood comb will be dark yellow to brown. The color comes from propolis and from thousands of brood cycles staining the cell walls. It doesn't mean the wax is dirty or unusable; it just won't be the pale gold of cappings. For cosmetic projects like lip balm where color matters, stick to cappings wax.
Uses for Beeswax
Clean, rendered beeswax is genuinely useful. Here are some practical applications for hobbyist quantities:
| Use | Notes |
|---|---|
| Wood conditioner for hive tools | Rub a block on hive tool and frame rest surfaces to reduce sticking |
| Lip balm and skin salve | Requires food-grade cappings wax; standard recipes use a 1:4 wax-to-oil ratio |
| Thread waxing | Drag linen or polyester thread across a block before hand-sewing leather or canvas |
| Candle making | Beeswax has a higher melting point than paraffin; use wicks sized for beeswax |
| Lubricating wooden drawers | Rub on sliding surfaces of furniture drawers and cabinet runners |
| Foundation for new frames | Hand-press thin sheets into frames or buy commercial foundation made from your own wax via some suppliers |
| Polish for cutting boards | Melt with mineral oil for a food-safe finish |
| Waterproofing leather | Rub on boots or straps, then warm gently with a heat gun |
The harvest timing guides on this site focus on honey quality, but the wax quality connection is real: frames harvested at the right time with fully capped cells give you both better honey and cleaner cappings for rendering.
Storing Finished Wax
Pour rendered wax into silicone molds, muffin tins, or small loaf pans lined with parchment. Blocks are easier to store and weigh than irregular chunks.
Label each batch with the year and source (cappings vs. old comb) if you plan to separate them for different uses. Store in a cool, dark place away from dust. Beeswax doesn't spoil; blocks stored properly last for years.
One practical note on quantity: after leaving the bees enough honey for winter and processing your harvest frames, don't expect huge wax yields from a small operation. Two or three hives might yield one to two pounds of cappings wax per season. That's enough for a handful of useful projects, but not enough to build a supply business. Treat it as a bonus material, not a revenue stream.
Frequently Asked Questions
Can I render beeswax in my regular kitchen pots? Technically yes, but wax is very difficult to clean off cookware. A dedicated old pot or thrift-store find is the practical answer. Once a pot has been used for wax, plan to keep it for wax.
Why does my rendered wax have white streaks or a bloom? White bloom on the surface of cooled wax is normal and harmless. It happens when wax cools too quickly or unevenly, causing some components to crystallize differently at the surface. Gently re-melt the surface with a heat gun or brief oven warming to smooth it out, or just leave it as is.
How do I get the wax residue off my tools? Let leftover wax cool and harden, then flex the container to pop it out. For stubborn residue, heat the tool gently in an oven or with a heat gun until the wax liquefies, then wipe with a paper towel while still warm. Avoid washing wax down the drain; it solidifies in pipes.
Is it safe to use wax from a hive that had chalkbrood? Chalkbrood is caused by a fungus (Ascosphaera apis). Unlike American foulbrood, chalkbrood is not known to survive high-temperature rendering and re-use. Most beekeepers render comb from chalkbrood colonies without issues, though some prefer to discard heavily affected frames out of caution. If the disease has resolved and the colony has recovered, the frames are generally considered usable.
How do I know if my wax is fully clean? Drop a small piece in a white bowl of water. Clean wax is bright yellow or pale gold with no visible debris. If you see dark specks suspended in the wax or a murky appearance when it's liquid, run another wash cycle.