Honey & Harvest
How to Extract Honey at Home, Step by Step
A practical guide to pulling supers, uncapping frames, spinning your extractor, and bottling clean honey — without turning your kitchen into a disaster.
Extracting honey is sticky, but it is not complicated. The beekeepers who dread it most are usually the ones who try to improvise — no clear workspace, honey dripping off every surface, bees finding their way indoors. Get organized beforehand and the whole process, from pulling supers to sealed jars, takes a few hours rather than a long, miserable afternoon.
Here is how to do it cleanly and efficiently.
Getting Bee-Free Supers Off the Hive
Before you can extract, you need frames with no bees on them. There are two reliable ways to accomplish this.
Escape Boards
An escape board (also called a bee escape or clearer board) fits between the brood box and the honey super. Bees can move down through a one-way valve but cannot return. Install it the evening before extraction day. By morning, most supers will be nearly empty of bees.
One important note: escape boards work only when there is no brood in the super. If the queen has laid above the escape, bees will stay to tend those eggs no matter what.
Brushing Bees Off Frames
For a hive or two, a soft bee brush works fine. Pull each frame, carry it a short distance from the hive, and brush the bees off with a few gentle strokes. The bees fly back to the hive on their own. Work quickly and keep a covered box or empty super nearby so you are not walking back and forth across an open yard with honey-loaded frames while bees investigate.
Either way, transport supers in a covered bin or wrap them in a sheet. Even a cracked-open super will attract robbing bees fast, especially later in the season.
Setting Up Your Extraction Space
Choose a room you can close off from the outdoors. Any bee that gets in will follow the honey smell and cause chaos. A garage with the main door shut, a laundry room, or a kitchen with windows closed all work.
Gear You Need
- Honey extractor (radial or tangential; hand-crank or electric)
- Uncapping knife (electric or heated by hot water) or uncapping fork/roller
- Uncapping tray or tank to catch cappings
- Food-grade buckets with honey gates (at least two, five-gallon)
- Fine strainer or double sieve (400–600 micron mesh)
- Large stockpot or settling tank
- Jar lids, labels, and clean jars
- Plenty of old towels or newspaper for the floor
- A source of hot water nearby for tools
Lay newspaper or drop cloths across the floor. Set up the extractor somewhere stable. Run the drain line from the extractor directly into a bucket below if your model allows it. The less you move honey between containers while it is still thin and fast-moving, the less mess you make.
Uncapping the Frames
Uncapping removes the thin wax layer bees seal over finished cells. Most of the honey is locked behind that cap, so the extractor cannot throw it out until the cap is gone.
Methods
Electric uncapping knife: The most consistent tool for anyone extracting more than a few frames. Run it across the capped surface in a smooth motion, following the contour of the comb. Let the knife do the work rather than pressing down.
Uncapping fork: Slower, but good for frames with uneven surfaces. Drag the tines through the capping layer; it scratches the cells open rather than slicing cleanly. Some wax stays on the comb, which is fine.
Uncapping roller: Spiked rollers puncture cappings rather than removing them. They leave more wax in the comb but speed up the process. Worth having as a backup tool.
Saving the Cappings
Cappings are valuable. They are high-quality beeswax mixed with a fair amount of residual honey. Let them drain in the uncapping tray over a double-mesh strainer for several hours (or overnight). The honey drips through; the wax stays. Melt the dried wax later for candles, foundation, or wood polish.
Do not throw cappings into a bucket and seal the lid. The honey that stays in them will ferment.
Spinning: Radial vs. Tangential Extractors
Step-by-Step Extraction
- Load uncapped frames into the extractor basket. Radial extractors hold frames with the top bar facing out and extract both sides at once. Tangential extractors extract one side at a time, so you will flip frames halfway through.
- Close the extractor lid.
- Start slowly. Spinning too fast on the first pass can collapse old or thin comb. Build speed gradually over 30–60 seconds.
- Run at moderate speed for 3–5 minutes, then stop and check. Honey should be flowing down the walls and pooling at the bottom.
- For tangential extractors, flip all frames and repeat.
- Do a final high-speed spin for 1–2 minutes to clear the last of the honey from the comb.
- Open the gate valve and drain into your bucket through the strainer.
Crush and Strain (No Extractor Needed)
If you keep foundationless hives, or simply do not own an extractor, crush and strain is a practical alternative. Cut the comb from the frames, crush it in a bucket using a potato masher or your hands, then let it drain through a coarse strainer into a settling bucket. It takes 24–48 hours to drain fully and destroys the comb, but the method requires almost no equipment. See crush and strain vs. an extractor for a full comparison of when each method makes sense.
Straining and Settling
Fresh honey out of the extractor contains wax particles, bee parts, and air bubbles. Run it through a double strainer (a coarse screen followed by a finer one) directly into a food-grade settling bucket fitted with a honey gate near the bottom.
Let it sit undisturbed for 24–48 hours at room temperature. The foam and debris float to the top; clear honey sinks to the bottom. When you bottle, open the gate and fill jars from below, stopping before the foam layer.
Do not over-filter. Running honey through very fine mesh removes pollen, which affects flavor and aroma. A 400-micron strainer pulls out wax and debris while leaving pollen intact.
Check moisture before bottling. Honey above 18.5% water content will ferment in the jar. Properly capped frames are almost always safe. For more on reading ripeness and capping, see when is honey ready to harvest.
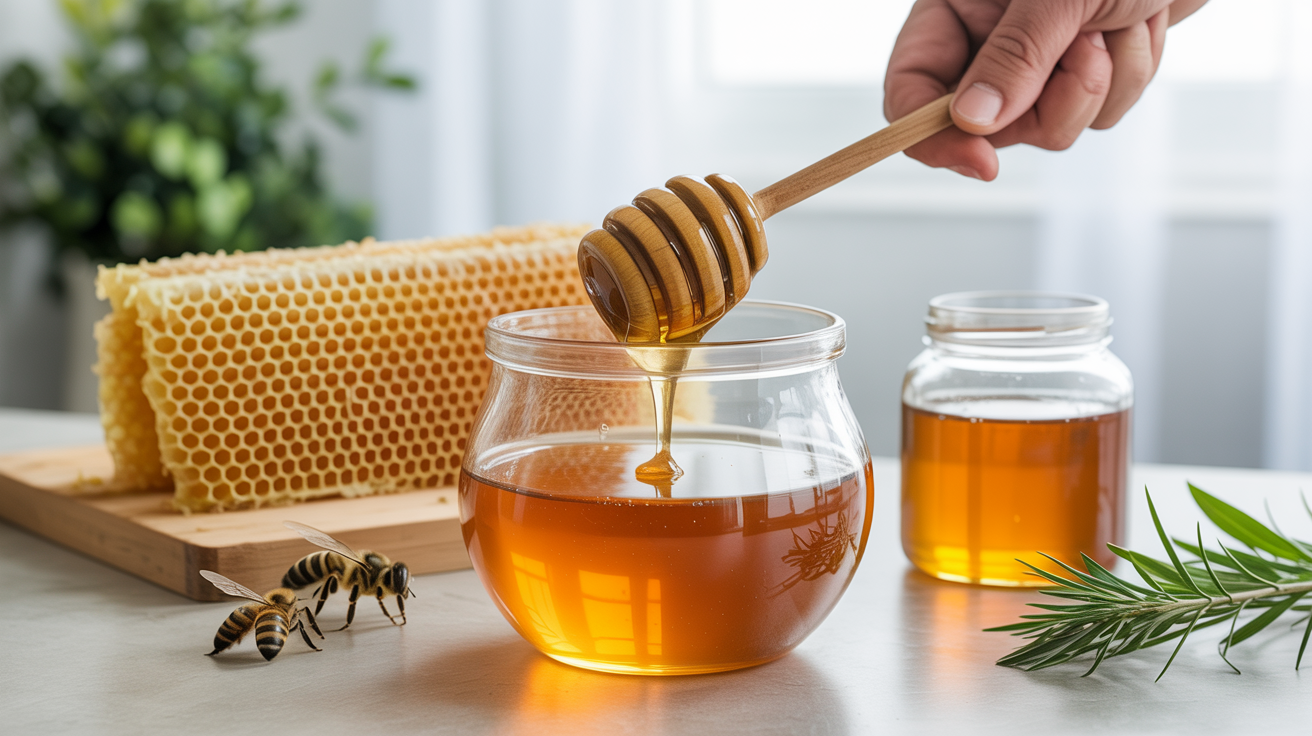
Bottling
Fill jars slowly to reduce air bubbles. Wipe threads clean before capping. Label with the harvest date and floral source if you know it. Store at room temperature away from direct light.
Honey crystallizes naturally over weeks or months. That is not spoilage — it is chemistry. Set jars in a bowl of warm water (no hotter than 40°C/104°F) to reliquefy if preferred.
Cleaning Up and Returning Wet Supers to the Bees
The Wet Super Return
After extraction, frames are coated in thin residual honey. Do not try to wash them. Instead, set the wet supers back on the hives at dusk (when flying activity is low) by placing them above the inner cover or between hive bodies. Bees will clean every cell in 24–48 hours, drawing the residue back down into the hive. Once frames are clean and dry, store them in a sealed container or freezer to protect from wax moths.
One caution: do not set wet supers out in the open yard. It triggers robbing behavior that can destabilize weaker colonies nearby. Always return them directly to the hive, in the evening, and seal any gaps.
Cleaning Equipment
Rinse honey tools in cold water first, then wash with hot soapy water. Hot water alone spreads honey further rather than dissolving it. The extractor can be rinsed in place if it drains outside, or wiped down with damp cloths and a final rinse. Let everything dry thoroughly before storing.
Frequently Asked Questions
Do you need a honey extractor to harvest honey?
No. The crush-and-strain method works well if you use foundationless frames or do not mind losing the drawn comb. It requires only a bucket, a strainer, and time. An extractor preserves the drawn comb, which bees refill faster than building new, so it pays off quickly if you extract more than once a year.
How do you get bees out of honey supers without an escape board?
Brush bees off each frame individually with a soft bee brush, working a short distance from the hive entrance so bees can fly home. A blower or fume board with a bee-repellent (Bee-Quick or Fishers Bee Quick) is faster for large operations. Avoid shaking frames, which can damage older comb.
Should you filter honey through a very fine mesh?
A coarse-to-medium strainer (400–600 micron) removes wax and debris while keeping pollen in the honey. Ultra-fine filtration (used commercially for clarity and longer shelf life) strips pollen and most aromatic compounds. For home extraction, a double mesh sieve gives clean honey without stripping flavor.
How long does the whole extraction process take?
For a hobbyist with one or two supers (20–40 frames), plan on three to four hours from setup through bottling, not counting the settling time. First-time extractors often take longer because they underestimate the setup and cleanup phases. Having everything staged before you open a single frame saves significant time.
What should you do with wet supers after extraction?
Return them to the hive at dusk for the bees to clean, then store frames in a sealed container (plastic bins with tight lids work well) or freezer to prevent wax moth damage. Freezing for 48 hours kills any wax moth eggs before storage. If you have enough storage space and extract every season, keeping clean drawn comb from year to year is one of the most productive things you can do for honey yields.
One last thing worth remembering: honey quantity varies a lot by season, forage, and colony strength. Do not read too much into a lighter-than-expected harvest in any single year. For guidance on how much honey to leave in the hive so colonies make it through winter safely, see how much honey to leave bees for winter.